“I’d love to try wearing a yukata, but I’m not sure I can do it by myself…”
If that sounds like you, don’t worry—we’ve got you covered.
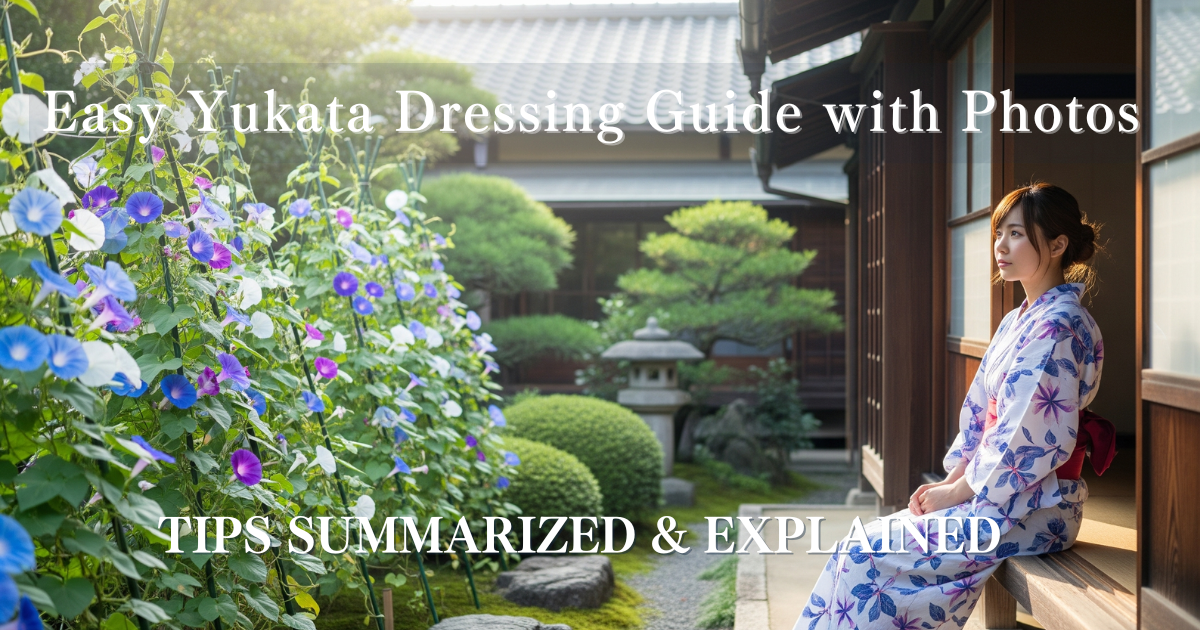
In this article, we’ll walk you through each step of putting on a yukata, with clear, photo-guided instructions designed especially for beginners.
From choosing the right undergarments to prevent see-through issues, to tips on how to move without ruining your look,
we provide practical advice from a professional kimono dressing perspective.
Be sure to check it out before your summer outing!
What You’ll Need Before Putting On a Yukata
To wear a yukata beautifully, it’s important to have not only the yukata and obi,
but also the essential accessories for proper dressing.
In this section, we’ll clearly explain the basic items you’ll need,
as well as helpful tools for adjusting the fit—so even beginners can feel confident getting ready.
Essential Yukata Items to Complete Your Look

【Yukata】
The star of the outfit. Your overall impression can change greatly depending on the pattern and size. Choose one that suits your body shape and the occasion.
【Obi (Hanhaba-obi or pre-tied obi)】
An accent piece that adds flair to your look. The color and tying style let you express your personality, so balance with the yukata is key.
【Zōri Sandals (or Geta Clogs)】
These complete your look with a cool, polished touch. Choosing the right size and comfortable straps (hanao) makes all the difference.
【Yukata Bag (Kinchaku pouch or basket bag)】
Function and fashion go hand in hand. Pick colors and materials that complement your yukata and obi to create a cohesive, elegant ensemble.
Check Your Yukata Size
While yukata can be adjusted to some extent, choosing one that matches your height and hip size will give you a more elegant silhouette and comfortable fit.
If you’re unsure, refer to the size chart below as a helpful guide.
| Size | Recommended Height | Hip Measurement | Recommended For |
|---|---|---|---|
| S Size | approx. 145–155 cm | up to approx. 90 cm | Perfect for petite figures. Easy to handle and creates a clean silhouette. |
| F Size (Free) | approx. 156–165 cm | up to approx. 94 cm | A standard, easy-to-choose size—great for first-time yukata wearers. |
| TL Size (Tall) | approx. 166–172 cm | up to approx. 94 cm | Ideal for taller individuals—provides enough length for worry-free wear. |
| 3L Size | approx. 173 cm and up | up to approx. 98 cm | Recommended for those who prefer a looser fit or want extra room around the hips. |
Essential Accessories for Yukata Dressing

【Undergarment (One-Piece Style)】
This inner garment is worn beneath a yukata or kimono to absorb sweat and help prevent the outfit from shifting out of place.
The one-piece style combines top and bottom for ease of movement and added comfort.
【Kimono Bra】
A special bra designed to gently flatten the bust, creating a smooth, elegant silhouette under kimono.
It provides light support without tightness, ensuring comfort throughout the day.
【Datejime (Mesh Type)】
A flat sash used to secure the yukata or juban (underkimono) in place and prevent it from loosening.
Mesh versions offer excellent breathability, making them ideal for summer.
【Obi-ita (Mesh Type)】
A stiff board inserted under the front of the obi to keep it smooth and wrinkle-free.
Mesh types are breathable and especially recommended in warmer seasons.
【Muslin Waist Cord】
A basic dressing item used to secure the yukata or juban snugly to the body.
Made of soft muslin, it’s easy to tie and gentle on the skin.
【Korin Belt】
An elastic belt with clips at both ends, used to hold the collar in place.
Very beginner-friendly and helps maintain a neat neckline.
【Kimono Clips】
Clips used to temporarily hold the collar or sleeves while dressing.
They prevent slipping and free up your hands, making the process smoother.
How to Wear a Yukata by Yourself
With a few simple tips, you can put on a yukata beautifully all by yourself.
Take your time to go through the basic steps and prepare the necessary items—practice makes perfect.
Once you get the hang of it, you’ll enjoy your summer outings even more, feeling confident and comfortable in your yukata.
🔸 Do your hair and makeup before dressing
(Applying makeup afterward may stain your yukata.)
🔸 Dress in front of a full-length mirror
(Checking your appearance in the mirror helps you adjust the fit properly.)
🔸 Wear a yukata slip underneath
(It helps absorb sweat and prevents the yukata from shifting out of place.)
🔸 Use a towel at the waist to adjust your silhouette
(This simple padding creates a smooth, balanced look.)
▶ Step 1: Center the Yukata on Your Back and Check the Length
First, align the two collar tips (eri-saki) at the center of your face, matching the inner collar (tomo-eri),
then adjust the back seam (the vertical seam down the back) so that it sits straight in the center of your back.
Next, hold a point about 15 cm above the collar tips with one hand, and grasp the back seam with the other.
Raise both hands to the same height, then slowly lower the yukata down to just above the floor to adjust the hem length.

▶ Step 2-1: Adjusting the Hemline
① Start with the left front panel (called the uwamae) when adjusting the hem.
Position the collar edge so it slightly covers the right side seam.
(Be careful not to wrap it too far, as it may restrict movement.)
As a general guide, the left edge should reach about halfway across your thigh.

② Once the left panel is in place, adjust the right front panel (the shita-mae).
While keeping the left panel steady, bring the right panel across carefully and align it.
Raise the hem so it sits about 15 cm above the floor—just enough to cover your toes without dragging.

▶ Step 2-2: Finalizing the Hem Position
Overlap the left front hem (tsuma) so that it sits about 7–8 cm higher than the right front hem.
For the most flattering line, align the front seam (okumi-sen) with the area near your right fourth or little toe.
Gently stretch the collar tip and hold it in place with your right hand, then secure the position with a waist cord.

▶ Step 3-1: Waist Cord
① Hold the center of the waist cord and place it over the tip of the right collar.
Press the collar tip firmly to help prevent the yukata from shifting.
Aim to tie the cord about 2–3 cm above your hip bones.

② Pull the cord gently but firmly around to the back.
Make sure it’s not too tight or too loose—just enough tension to keep it snug against your body.

▶ Step 3-2: Tying the Waist Cord
③ Bring the waist cord around to your back, keeping it level on both sides.
Pull it snugly along your body as you wrap it behind you.

④ Tie the cord at the tip of the left front panel (uwamae).
Leave just enough room to fit one finger between the cord and your body for comfort.
However, avoid tying it too loosely, as that can cause the yukata to slip out of place.
After tying, tuck in the ends of the cord neatly.

Checkpoints After Tying the Waist Cord
Check whether the okumi-sen (front seam) is in a straight vertical line.
When the seam is aligned properly, your yukata will look neat and be less likely to come undone.
Causes and Fixes When the Front Seam Is Misaligned
1. The waist cord is slanted upward on the right side
→ When the cord tilts upward, the upper front panel (uwamae) lifts, which causes the front seam to slant.
2. The hem overlap is off
→ If the layering between the upper and lower front panels is not done correctly, the seam will not align.
→ In particular, check how high the corner (tsuma) of the upper front panel is raised and how firmly the collar tip is pulled, and adjust accordingly.
3. When ready-made yukata don’t fit well around the waist
→ For pre-sewn yukata with extra length, placing the waist cord slightly higher often helps keep the collar alignment in place.
▶ Step 4: Adjusting the Collar
When adjusting the collar, hold the collar edge (eri-yama) of both the upper and lower panels.
Then, following steps ①→②→③, carefully overlap the fabric at the daki-haba (the front chest area) to create a deeper, secure fold.
The key is to shape the collar gently while keeping an eye on the overall balance, making sure no wrinkles appear around the chest.


Final Check After Adjusting the Collar
Check once more that the okumi-sen (front seam) on the upper front panel is in a straight line.
→ After completing the collar adjustment, this final check will help ensure a clean, polished look.
Make sure the ohashori—the fold at the waist—lies flat, with the upper and lower layers aligned perfectly to appear as a single piece.
→ Check from the side in a mirror to confirm there are no wrinkles or gaps.
▶ Step 5-1: Korin Belt
① Adjust the Korin Belt so that it is slightly wider than your shoulder width.
First, gently pull out the lower front panel, and clip the Korin Belt about 10 cm below the inner collar (tomo-eri)—roughly around the narrowest part of your waist.

② Using the clip as a starting point, fold up the ohashori of the lower front panel to shape it neatly.
As you do this, pull the belt gently to raise and secure the ohashori firmly in place.

▶ Step 5-2: Securing the Korin Belt
① Bring the Korin Belt around to your left side and pull it out through the side opening (mihachiguchi).Use your left hand to hold the clipped position in place, then guide the belt toward your right side.
② Switch the belt to your right hand and clip it while adjusting the collar of the upper front panel.Make sure both sides of the collar are aligned at the same height.


▶ Step 6: Datejime (Flat Sash)
① Place the datejime along your back and bring it around to the front.
As you do so, gently smooth out any looseness at the chest by shifting the extra fabric toward the sides.
Adjust any wrinkles to keep the collar area neat and tidy.

② After tying the datejime in the front, gently pull it slightly downward to adjust.
This helps the collar settle nicely and gives your overall appearance a more polished finish.

▶ Step 7: Final Check & Key Points


① Left side seam of the upper front panel:
Is it positioned about halfway across the width of your thigh?
② Right side seam of the lower front panel:
Does it run down the center between your legs?
③ Collar alignment:
Is the overlap relaxed enough to fit one or two fingers comfortably?


④ Ohashori:
Is it mostly straight, or gently curved like the bottom of a boat?
⑤ Upper front hem (tsuma):
Is it raised about 4–5 cm higher than the lower front panel?
⑥ Back collar gap:
Is there a space about the width of three fingers to one fist at the nape of the neck?
Summary: The Key to Yukata Dressing is Order and Balance
Dressing in a yukata can be done beautifully, even by beginners, by carefully following each step one at a time.
Key points to focus on include adjusting the hem, tying the waist cord, arranging the collar, and shaping the ohashori (folded fabric at the waist).
At the end, check your overall balance in the mirror and make small adjustments to the collar alignment, side seams, and the amount of fabric pulled at the back of the neck.
Even if it seems a bit tricky at first, once you understand the key tips, yukata dressing becomes much easier and more enjoyable.
💡5 Tips for a Beautiful Yukata Fit
1. Gently pull back the collar (emon) for a graceful neckline
→ Aim for a gap of about three fingers to a fist. This reveals the nape of the neck and adds elegance.
2. Take your time adjusting the hem first
→ Once the length is set properly, the rest of the yukata will fall into place more easily.
3. Tie the waist cord firmly, but not too tight
→ Leave a little room—about one finger’s width—while making sure it’s secure.
4. Keep the collar soft and symmetrical
→ A well-balanced overlap between the upper and lower collars makes the neckline look neat and flattering.
5. Shape the ohashori with a gentle curve like a boat bottom
→ Instead of making a perfectly straight fold, aim for a slightly rounded shape for a softer, more natural look.
Let’s enjoy wearing a yukata at your own pace, practicing little by little along the way!
▶ Recommended Articles
Articles for “After Wearing” (Following the natural flow of actions)
【Easy Steps】How to Care for Your Yukata — Washing and Storage Tips
→ A must-read guide for post-wear care. Essential for guiding users to their next step.
【Photo Guide】How to Fold a Yukata Properly
→ Ideal for those wondering how to store their yukata after wearing. High click-through rate!
Articles to Revisit “Before Wearing” (For preparation or review)
【Beginner-Friendly】How to Choose the Right Yukata — Color, Size & Patterns
→ Great for readers who are unsure about selecting a yukata in the first place.
How to Choose Yukata Obi — Types of Hanhaba, Heko, and Pre-tied Obi Belts
→ Often read alongside dressing guides, this article answers common questions about obi types.